You have located your vegetable garden, determined the size, and prepared the soil.
The Holland Housch | Planning for a New Vegetable Garden
You have successfully planted your seeds, tagged your containers, and started tracking your planting history.
The Holland Housch | Sowing Vegetable Seeds Indoors
Now the seedlings are visibly rising from the soil and for the next 2-6 weeks—until you transplant your seedlings into the garden—your job is to keep those seedlings healthy and happy. Happy plants produce a bountiful supply of vegetables.
Here are five of your key responsibilities in caring for your seedlings.
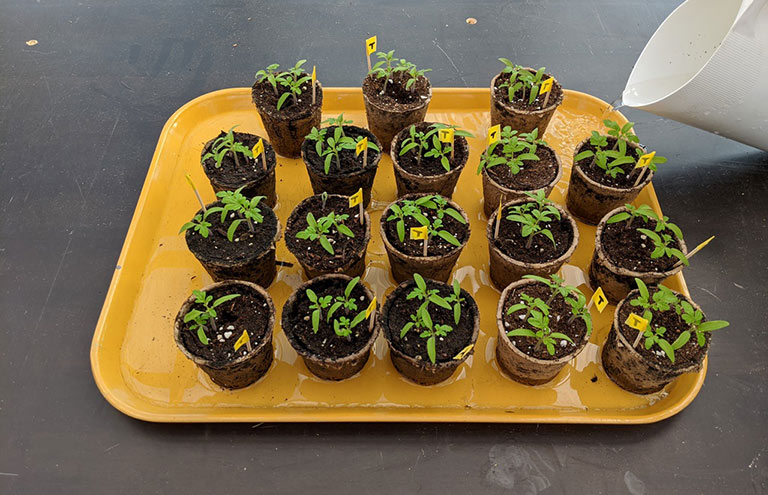
WATERING THE SEEDLING TRAY
Watering
Throughout the seeding and seedling stages of growth water is critical. Soil should be kept moist but not soaking wet. Ideally seed pots are kept on trays and the trays are watered. This method of bottom watering helps prevent overwatering.
The pots—assuming they have holes in the bottom—will soak up the water from the tray. When the soil has soaked up enough water it will look moist at the top of the pot. The excess water in the tray is then discarded.
Water your seedlings at least a few hours prior to transplanting them, whether into a larger pot, or into the garden.
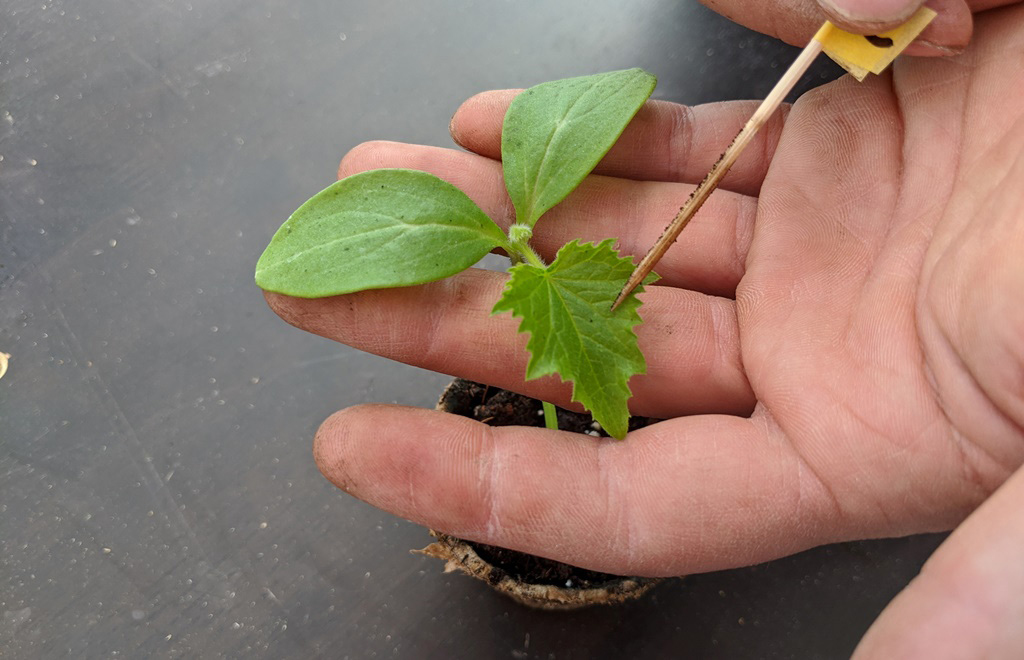
POINTING OUT THE TRUE LEAF ON A CUCUMBER SEEDLING
Fertilizer
When a seed sprouts it will grow a set of leaves called cotyledons. Cotyledons are not the “true leaves” of the plant. These “first leaves” are nourished by the seed and only need light to grow. This is one of the reasons that seed starter mix generally has little to no added nutrients or fertilizer.
True leaves—the second set of leaves—are nourished by light and nutrients in the soil. When these true leaves appear, it is time to start fertilizing your seedlings with a diluted water-soluble veggie appropriate fertilizer. Apply ¼ to ½ of the recommended rate of fertilizer. For example, if the instructions say you apply 60mL of fertilizer to 5L of water, then mix 30mL of fertilizer to 5L of water. Water your seedlings from the bottom tray, as previously discussed, with the fertilizer/water mix. Discard any excess water into a bucket and use it outdoors on your flower or perennial beds.
Fertilize your seedlings once or twice a week depending on the strength of fertilizer you apply. If you apply ¼ the recommended rate, then fertilize twice a week. If you apply ½ the recommended rate, then fertilize once a week.
You can continue this feeding program until you begin the hardening off phase for transplanting. Once the seedlings have been successfully transplanted into the garden you may resume with full strength feeding as recommended for the fertilizer.
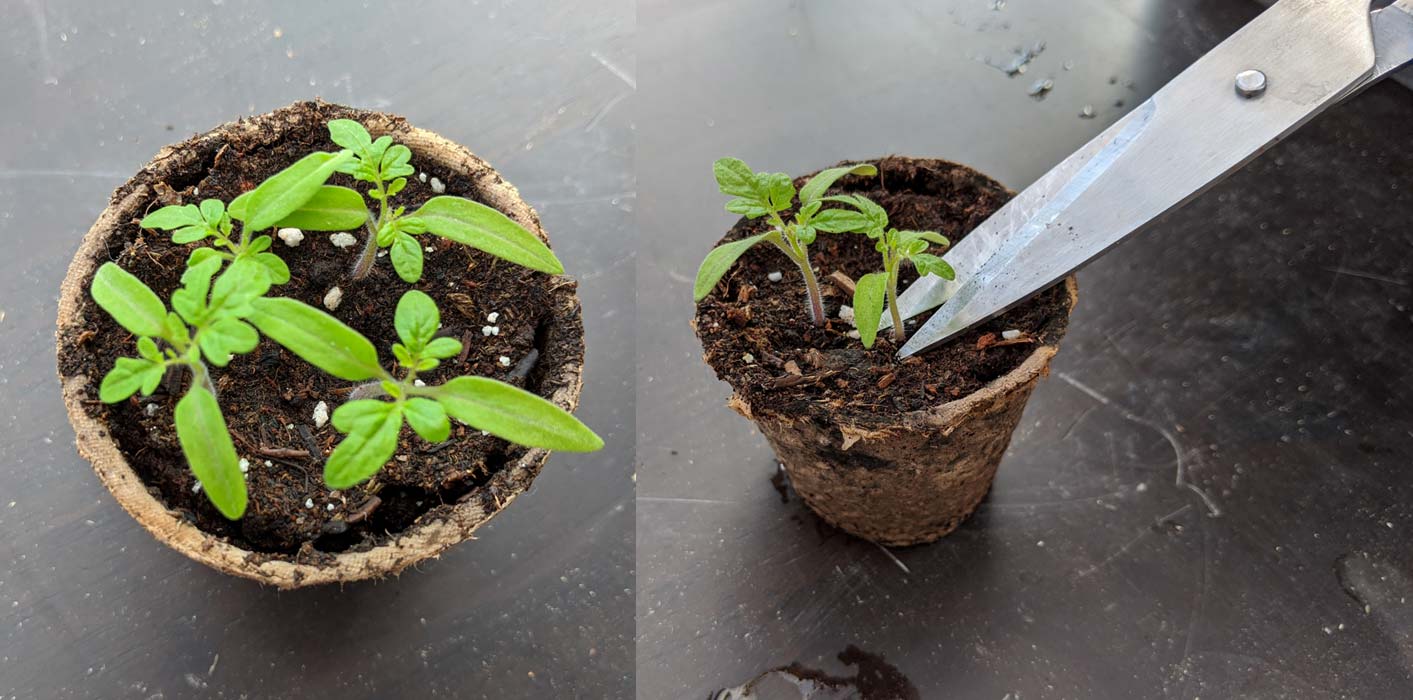
THINNING TO THE STRONGEST AND HEALTHIEST SEEDLING
Thinning the Seedlings
When seedlings sprout their second pair of “true” leaves they will either need to be thinned or transplanted to bigger pots.
If you have planted multiple seeds per pot and you only intend to keep one of the seedlings, thin all but the strongest and healthiest looking seedling. Simply pinch or snip the extra seedlings at the base of the plant. You can also try gently pulling the excess seedlings from the soil, but only when you are sure you will not disrupt the root system of the remaining seedling that you are keeping.
Thinning the seedlings may allow you to keep the remaining plant in the pot for a longer period, as the roots will no longer have any competition; but this depends on how fast the seedling is growing, how big the pot is, and how soon you will plant it outside.
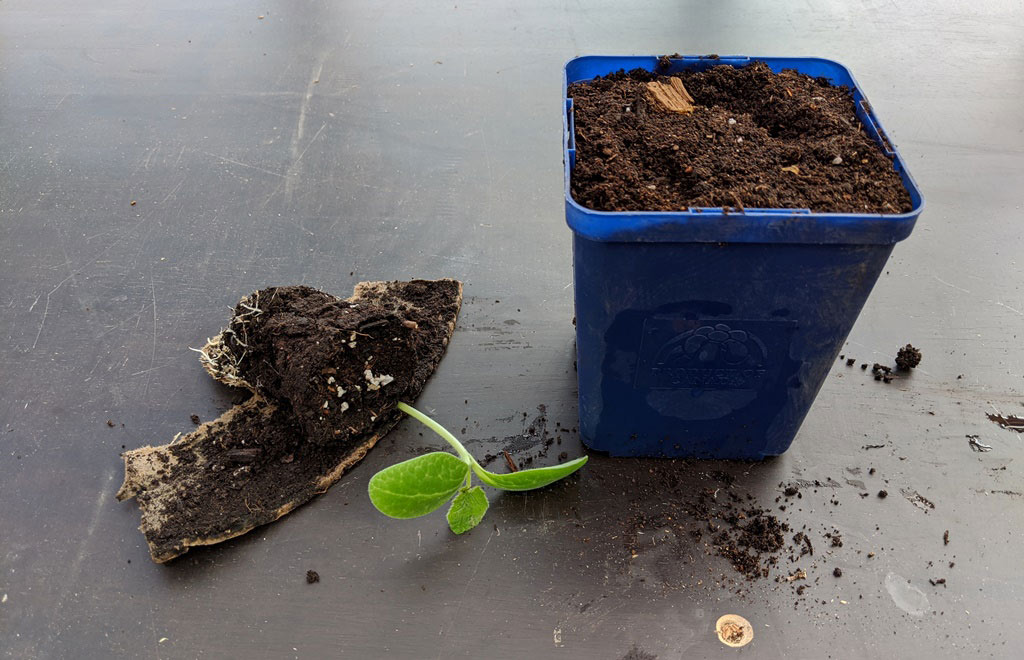
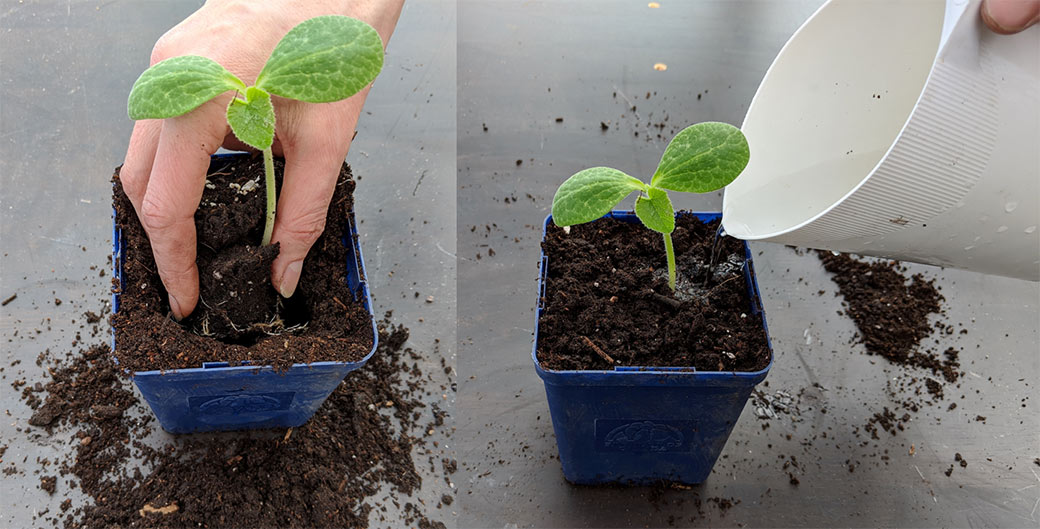
PREPARING SEEDLING FOR TRANSPLANT
Transplanting to Bigger Pots
When you have decided to transplant your seedlings, the first step is to set up your new pots. You will be migrating your seedlings to the next pot size, which is typically a three to six inch pot, in diameter or width. Fill all the pots with potting soil—you no longer need seed starting mix—and premoisten the soil with water.
Refrain from pulling all the transplants out of their pots at once. It is best to work with a few transplants at a time. You do not want the roots to dry out from prolonged exposure to warm air.
Gently massage the container with the seedling and slide a fork down the inside of the container between the soil and the pot. Lift the seedling root ball and soil out of the container. Make sure the roots are not too tangled or too dense. If they are, you may need to massage the root ball to separate the roots.
In your new pot, make a hole in the soil slightly bigger than the root ball of the transplant. Gently place the roots in the new pot and soil. You want the base of the stem to be level with the soil line at the top of the pot. Close up the hole with additional soil while positioning the seedling stem and leaves upright. Lightly press the soil to secure the root ball and plant into place. Water the newly potted seedling and keep it out of direct sunlight for a few days while it recovers from the move.
If you plan on transplanting multiple seedlings that have come out of one pot, you will need to separate them. After pulling the root ball out of the pot, gently tease the roots of the individual plants apart. The stems and roots of the seedlings will be very fragile, so handle seedlings with care. It is likely you will damage a few of the seedlings during this process.
TRANSPLANTING AND WATERING A YOUNG SEEDLING
Hardening Off
When it is time to transplant your seedlings into the garden they will need to be “hardened off”. In the comfort of your home seedlings have not been exposed to the harsher outdoor climate. Wind, sun and heavy raindrops can quickly deteriorate the health of your seedlings or kill them.
Basically, over the course of 10 days you are going to expose your seedlings to their new outdoor garden environment for longer and longer periods. The following schedule is an approximate guide, and example of how you might hardening off your seedlings. Throughout the hardening off process remember that the goal is to GENTLY and GRADUALLY expose your seedlings to their new environment. Any extreme weather conditions (heat, wind, rain etc.) should be avoided and your schedule should be adjusted to accommodate.
Day One:
Stop fertilizing your plants. Choose a sheltered spot in your yard that gets some bright light or filtered sun (not direct sun). This could be a green house, a cold frame, or a porch with overhead protection. A bright but overcast day is perfect.
Place the seedlings in your chosen spot for about two hours. Avoid exposing your seedlings to rainfall for the first week. Keep the seedling soil moist. Outdoor conditions can dry out the soil quickly and if the roots dry out it could compromise the health of your plants.
Day Two:
Place seedlings in sheltered spot for three hours.
Day Three:
Place seedlings in sheltered spot for four hours.
Day Four:
Place seedlings in sheltered spot for five hours.
Day Five:
Place your seedlings outdoors in the sheltered spot for about five hours and then move them into the vegetable garden area—their new home—for one hour. Ideally this first hour in direct sunlight is in bright but overcast conditions.
Day Six:
Place seedlings in sheltered spot for four hours.
Move them to vegetable garden area for three hours.
Day Seven:
Place seedlings in sheltered spot for three hours.
Move them to vegetable garden area for five hours.
Day Eight:
Place seedlings in sheltered spot for two hours.
Move them to vegetable garden area for seven hours.
Day Nine:
Place seedlings in sheltered spot for one hour.
Move them to vegetable garden area for nine hours.
Day Ten:
Plant those babies in your garden.
Check in with us in the coming month for great tips on planning your vegetable garden layout.
If you are dreaming of having a vegetable garden or growing your own food, consider getting design assistance. Design for Conscious Living® can help you with the design, layout, and proper placement of your garden to ensure you have the foundation in place to grow your edibles successfully. Even if you live in the city, where urban gardening is becoming increasingly popular, we can help you make your plants and the plot where you grow them look aesthetically pleasing.