Last weekend Justin and I started the installation of our new vegetable garden. We were originally planning on finishing the house renovations before we started the vegetable garden but Covid 19 has put an interesting spin on our lives. This spin is a good one. As you can see in the video and the images below, the vegetable garden has now been added on as an extension of the greenhouse. You may also notice that it curves slightly to the left. We positioned it in that way so that it clears the septic bed, gets optimal sun exposure, is close to the house and water source, and works well with our future landscaping plans.

Where to Position your Vegetable Garden
Choosing the site for your vegetable garden requires some thought. A lot of work will go into its planning, care, and maintenance; and it would be a shame if all your efforts resulted in a mediocre harvest. Here is a list of key things you want to consider:
- In general, vegetable gardens need full sun—six hours of direct sunlight or more per day. Adequate amounts of sunlight will yield bigger and better tasting produce. If direct sunlight is scarce you may want to consider breaking up your garden into sections. Place heat loving plants like eggplant, squash, peppers, tomatoes, and beans in the full sun, and place leafy greens and other part shade tolerant plants in the part sun locations. Part sun means a minimum of four hours of direct sun per day.
- You may need to prepare a sun chart to measure the total hours of sunlight. The easiest way to do this is to take a photo of your chosen site once every hour from sunrise to sunset. You will need to be home for the entire day to do this. At the end of the day compare the photos. If you are seeing a lot of sun and shade movement it might be helpful to map out your garden on paper and divide it into quadrants. Using the photos, you can count how many hours of sun each quadrant gets per day. Some spots might get shade in the afternoon but the four hours of sun in the morning and two hours in the evening add up to a full six hours.
- A true professional will do this sunlight measure three times per year, once in late spring, once in summer and once in early fall. Through the seasons, the angle of the sun in the sky can change the hours of sunlight. It is optimal to do this research one full year prior to digging the garden beds.
- Your garden NEEDS water. It is essential for its success. Choose a location that is close to a water source like an outdoor tap and garden hose, or a rain barrel.
- A spot not too far from the house is ideal as you will likely be tending to the garden daily. It is also a place where guests and family members like to visit so provide a pathway or easy access.
- Locating the garden so that it is vehicle accessible is a nice bonus, as you will need to add mulch and soil supplements. At the very least all areas of your garden need easy access with a loaded wheel barrel.
- The South, East and West side of your home will get the best sun. Do not be afraid to position your garden on the front lawn if that is the ideal spot. A well-designed layout, decorative fence and regular garden upkeep can go a long way to making your garden attractive. Do check into your local city by-laws to make sure you can have a vegetable garden on your front lawn.
- Make sure the site you choose is not the lowest point of land in your yard as this may make it susceptible to flooding and/or a late spring thawing of the soil in that area.
- And lastly, do not locate the garden too close to large trees or soon to be large trees. You will run into root, water, and nutrient competition.
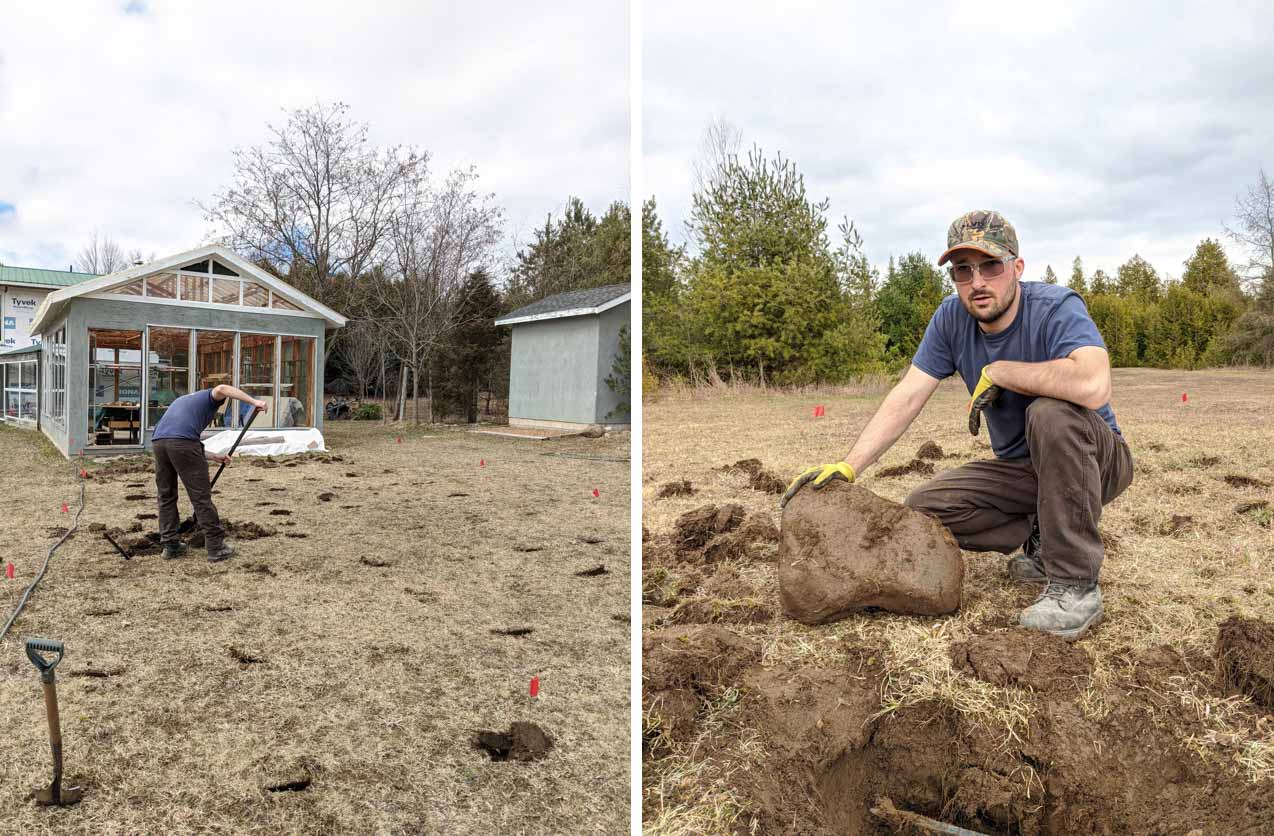
LOCATING AND DIGGING UP ROCKS
How Big Should Your Garden Be?
The size of your garden will be determined by how much land you have available and how many vegetables you would like to grow. If you are inexperienced, it might be wise to start with a smaller plot of land so that you can get a feel for how much food your seeds produce, how big the plants get, and how much work is involved. Check out my post titled 3 Benefits of an Urban Garden and 3 Tips on How to Start One, which explores edible gardening in containers.
Mistake number one in vegetable garden planning is underestimating how much time you have. Vegetable gardens, especially larger ones, will need some level of daily care and maintenance. Here is another related post you might enjoy on edible garden design.
Justin and I are starting with a garden 16’ wide and 70’ long. We both have experience with vegetables and/or gardening, so this size feels like a comfortable starting point for us. The main path—about 3’ wide—will run along the length of the garden. From the main path the rows will branch out—approximately 10 double planted rows, with pathways 2’ wide running in between the rows. We have the luxury of space in our yard, so increased accessibility is a logical choice.

TILLING THE NEW GARDEN BED
Preparing the Soil
Good soil supplementation—compost, well-rotted manure, leaf mould, or seaweed—is easily the second most important factor in the success of your vegetable garden. If you have poor soil you will need to mix in some of this organic material. You may also want to do a soil sample test for soil type and PH level.
Even with healthy soil supplementing should be a bi-annual process, once in the fall and once in the spring. Spring applications should be scheduled at least two weeks before planting so that the supplement has time to integrate. Healthy soil will be loamy, well-drained and free of larger stones and rocks. This will encourage good root development and allows oxygen to reach the roots.
Your vegetables will remove valuable nutrients from the soil, and it is important to keep the nutrient levels replenished. Keep in mind that those nutrients get passed along to you. A depletion of nutrients results in less nourishing and less tasty produce.
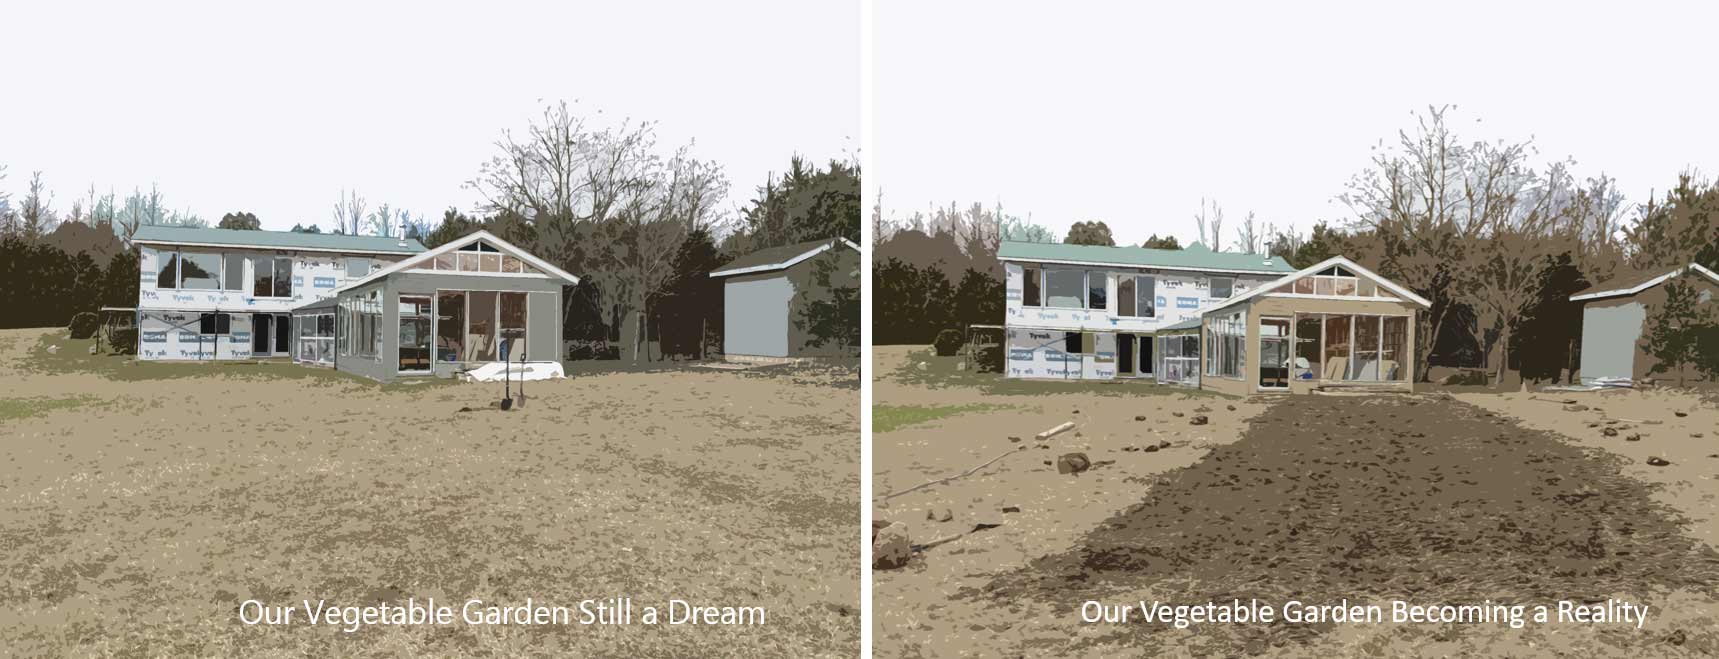
BEFORE AND AFTER OF OUR NEW VEGETABLE GARDEN BED
Our soil preparation began with the removal of rocks. We inserted a garden spade 8” into the ground in random locations and dug up what we could find. Additional rocks were revealed and pulled from the soil as our neighbour tilled the garden with his tractor plow. The entire bed was tilled three times to grind and mix the vegetation. A week later we added organic soil supplements and tilled the garden one last time. In a few weeks, when the soil has had time to settle, we will be ready for planting. Check in weekly to see how our vegetable garden is evolving.
If you are dreaming of having a vegetable garden or growing your own food, consider getting design assistance. Design for Conscious Living® can help you with the design, layout, and proper placement of your garden to ensure you have the foundation in place to grow your edibles successfully. Even if you live in the city, where urban gardening is becoming increasingly popular, we can help you make your plants and the plot where you grow them look aesthetically pleasing.