A few weeks ago, Justin and I started the process of sowing seeds indoors for our vegetable garden. It has been exciting to watch all the seeds germinate and sprout into young seedlings. Follow these seed sowing tips and you will be well on your way to successfully seeding your vegetable garden. I have also included a simple step by step video for additional guidance.
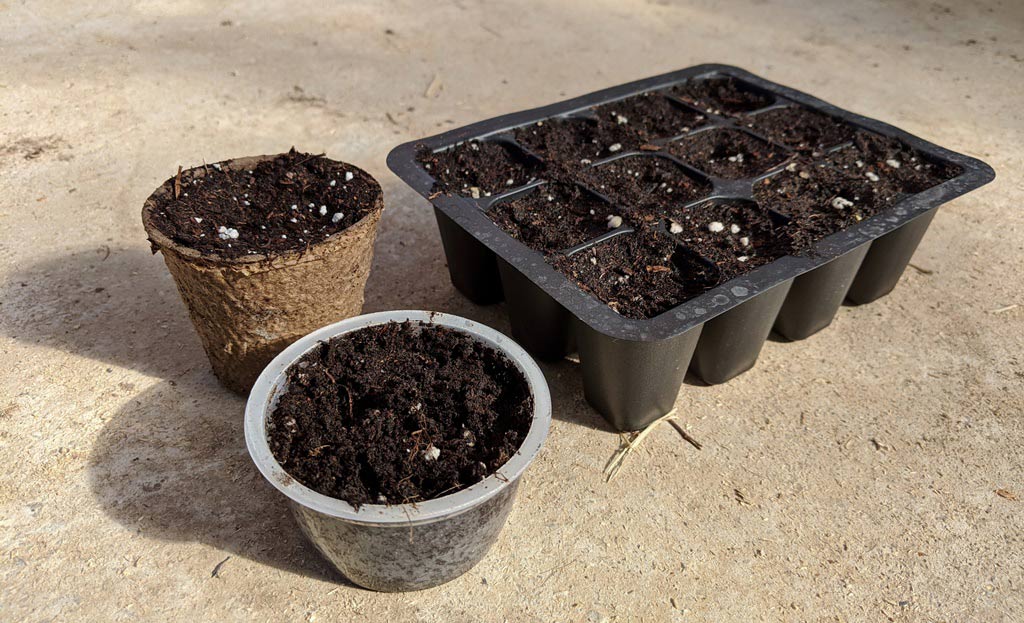
TESTING THREE DIFFERENT SEED PLANTING CONTAINERS
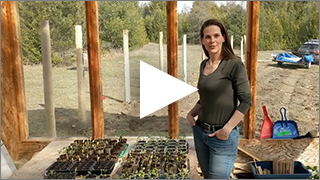
Seeding Containers
There are different types of seed planting containers. This year Justin and I tried a mix of the following three types to see which one we liked the best:
- small biodegradable seeding pots
- multiple cell seeding flats
- applesauce snack size containers— we cleaned the cups and drilled holes in the bottom
So far, I like the applesauce containers the best. They are a nice size and retain the water well, which reduces the amount of watering. They are stiff enough so that the soil does not get disturbed when I move them around, but flexible enough to push the root ball out of the container for transplanting. Small snack size yogurt containers would be a similar option.
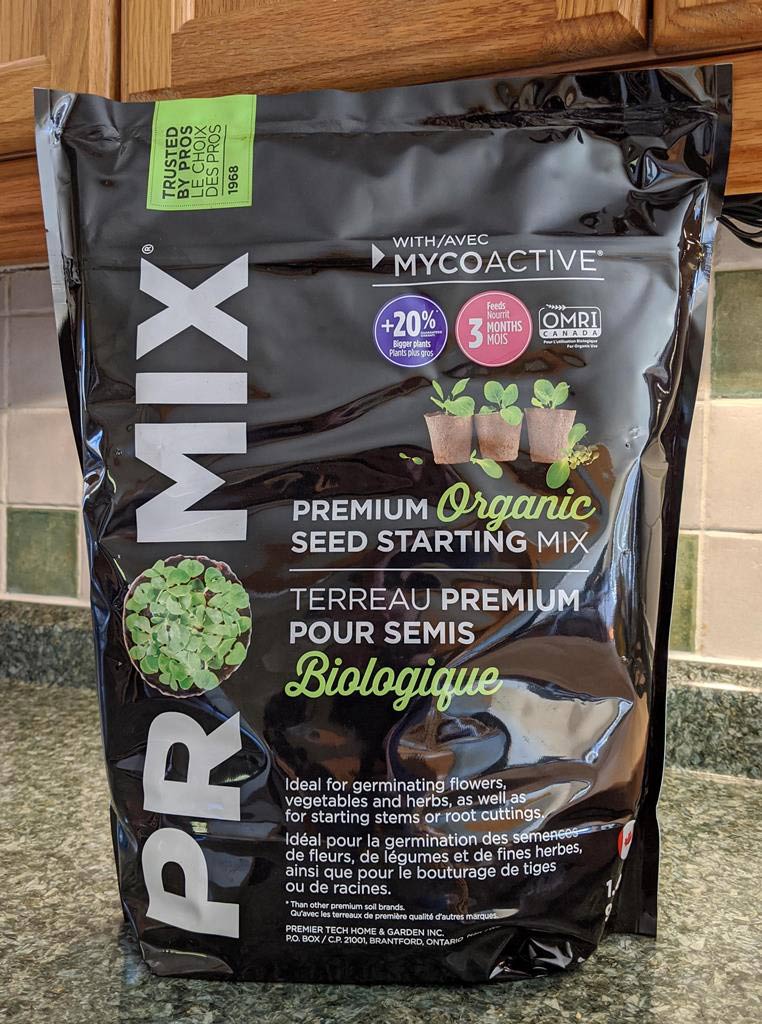
SEED STARTING MIX BY PRO-MIX
Seed Starting Soil
This year we purchased an organic seed starting mix from a company called Pro-Mix. During the Covid-19 crazy, it was what we were able to find at our local Home Depot. I have been very pleased with the results and would certainly consider purchasing it again. Seed starting mix is a specialized formula that drains well, is light enough for young roots, and it is free of any plant disease spores that may damage, weaken, or kill your seedlings.
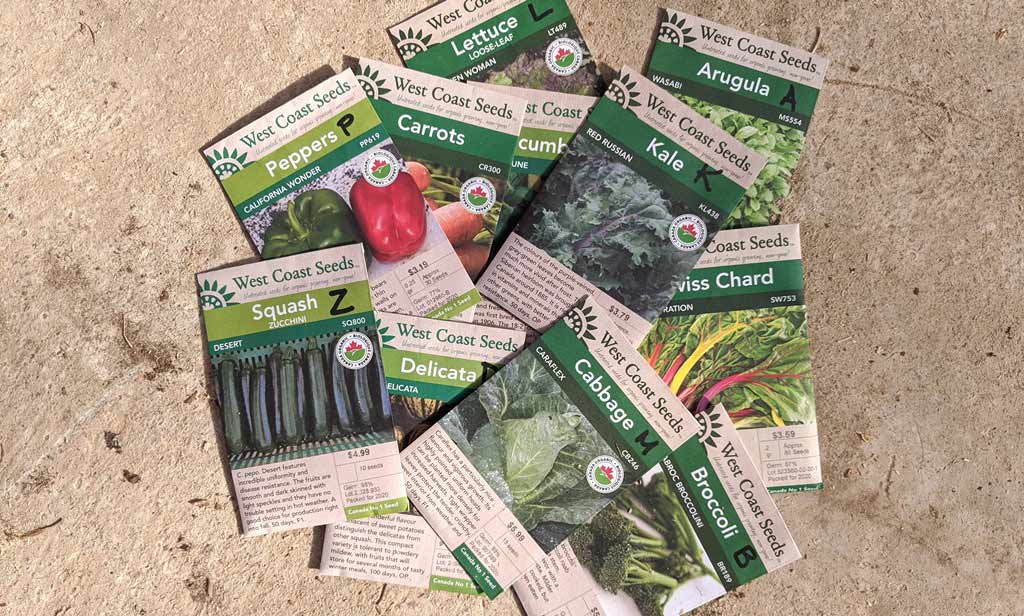
VEGETABLE GARDEN SEEDS BY WEST COAST SEEDS
Seeds
It is recommended that you purchase your seeds from a reputable seed company for fresher, higher quality seeds. It takes money and time to grow your vegetables; a few extra dollars spent on good seeds in the spring, will generally yield a better and more nutritious crop in the fall. Things like germination percentage and purity of the breed are important. This year we purchased our seeds from West Coast Seeds. After finding their seed packets on display in my local organic food store, I researched the company and the seeds they offer. I am excited to see how they grow and produce.
Preplanning the Planting
There is a lot of value in knowing how many seeds you need to plant. You do not want to waste seeds, especially if you have purchased good ones. The number of seeds you sow indoors will be based on how many rows of each vegetable you would like to plant, and how far apart the plants need to be spaced when you transfer them to your garden. Also consider whether you will do succession planting—for example starting a new row of lettuce 2-3 weeks after the first row, so that you can reap your harvest over a longer period.
Start by sorting through the seed packets and familiarizing yourself with the vegetables that can be pre-planted indoors vs. the ones which prefer to be sown directly outdoors. Decide how many seeds you are going to start indoors, and how many rows/plants of each vegetable you are interested in, and/or have room for in your garden.
The cabbage seed packet that we purchased from West Coast Seeds came with 15 seeds. Cabbage transplants need to be spaced 18-24” apart in rows 24-36” apart. Our vegetable garden rows will be approximately 12’ long, which means we can have 6-7 cabbage plants per row. We decided to plant one row of cabbage (7 seeds) indoors, and then direct sow a second row of cabbage outdoors later in the spring. Knowing this information helped us avoid wasting our organic cabbage seeds.
You will also want to account for the germination rate. Some of your seeds will not germinate no matter how carefully you care for them. Plan for this by planting a few extra seeds.
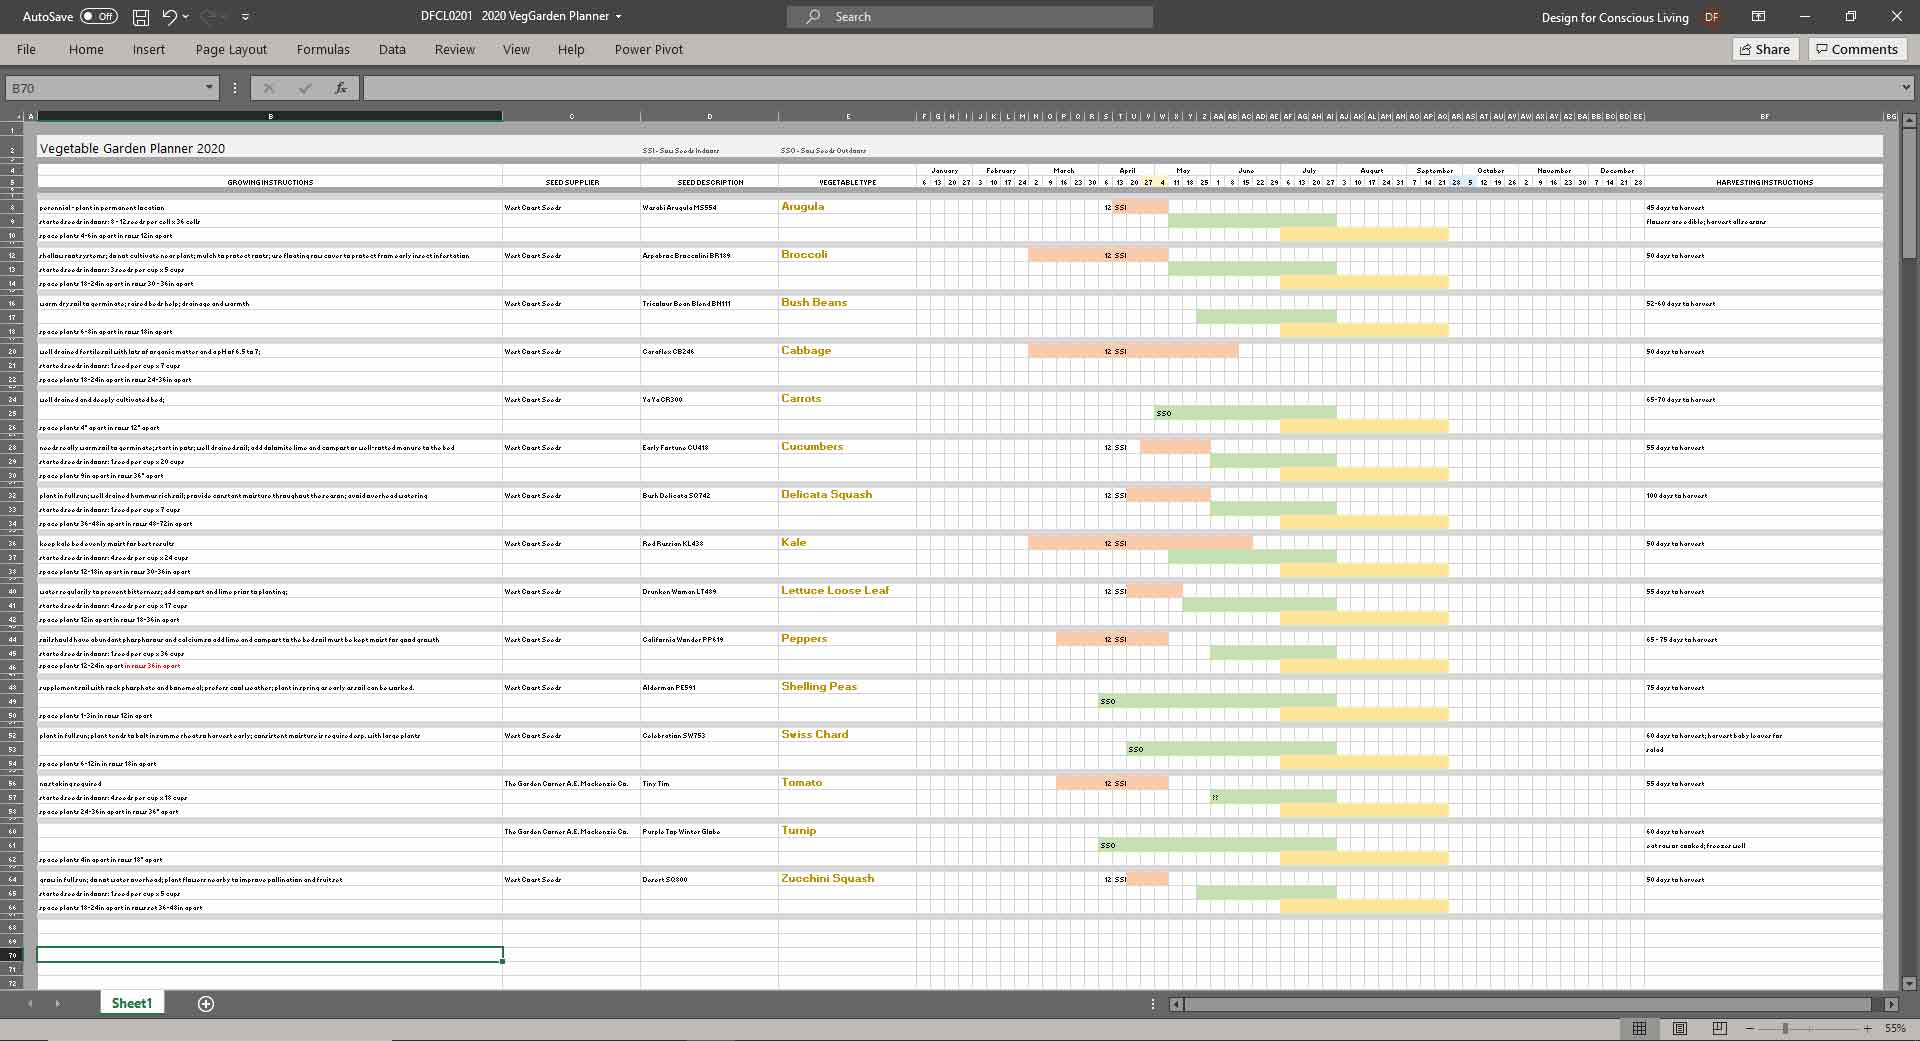
VEGETABLE GARDEN PLANNER DESIGNED IN A MICROSOFT EXCEL SPREADSHEET
To track what we planted I made a chart in Microsoft Excel and entered the seed packet information into the chart. Based on when each vegetable could be safely planted outdoors, I was able to plan “approximately” when to start the seeds indoors. This year, because we were a little bit late in planting our indoor seeds, everything was planted on the same day.
TRACKING VEGETABLE GARDEN INFORMATION
Using this chart, I will continue to track other important dates; like when I start succession plants, when transplants are put in the ground, and when produce gets harvested. This information will help me make future vegetable garden plans, like which vegetable were the most successful, and how much produce we harvested from each row or plant.
Preparing the Soil
We filled the containers to the top with the seed starting mix and then we watered the soil until it was thoroughly moist. Watering can be done in a variety of ways. I used a spray bottle filled with water and sprayed the soil multiple times over the course of an hour to wet the soil through the container. Another method is to set a tray under the containers and pour water into the tray, allowing it to soak up through the holes in the bottom of the container. Some people like to pre-moisten their soil before they put it into the container. This gets messy so choose your prep area accordingly.
Planting the Seeds
Once the soil is nicely moistened you can plant the seeds in their designated containers. The seed packet will tell you how deep to plant the individual seeds. A homemade depth marker made from a popsicle stick works well. Mark the stick in 1/4” increments to the depth of your deepest seed.
Stick the depth marker into the soil and rock it back and forth gently, creating a hole. Drop the seed into the hole and make sure it has dropped all the way down. Gently cover the seed with soil. Be careful not to plant seeds deeper than suggested. The plant may not have enough stored energy to push the sprout to the surface.
Tag your Seed Containers
Tag the seed container so that you know which seed you have planted. I show you how to make tags out of toothpicks and masking tape in the video. We have received a lot of compliments on our plant tags.
Growing Conditions
When your seeds are all planted and tagged, place them in a warm area of the room (18 – 24 degrees Celsius), and keep the soil moist (but not saturated). When you see a green sprout coming out of the soil then light becomes important. You will either need to invest in a growing light or a greenhouse. If you have a bright window this can also work but you will need to rotate your seeds a few times a day otherwise the sprouts will start growing in the direction of the window instead of upwards.
Check in with us in the coming month for more tips on fertilizing and transplanting your seedlings. For great tips on planning your new vegetable garden read last weeks post The Holland Housch | Planning for a New Vegetable Garden.
If you are dreaming of having a vegetable garden or growing your own food, consider getting design assistance. Design for Conscious Living® can help you with the design, layout, and proper placement of your garden to ensure you have the foundation in place to grow your edibles successfully. Even if you live in the city, where urban gardening is becoming increasingly popular, we can help you make your plants and the plot where you grow them look aesthetically pleasing.